Contents
Gaming often means that you spend much of your time on a laptop or PC, but what it really means is that you will spend much of your time typing on your keyboard. Over time, this collects dust, dirt, food crumbs, and oils. Not to mention a time or two that you got too rowdy and knocked over a drink.
This kind of wear and tear adds up and can make your keys stick and make gaming more difficult, and annoying. Keeping your mechanical keyboard clean is a must. But accidents happen, and if this happens to you and you find yourself in need of cleaning your keyboard, then you’ll need to know a few things.
The best way to keep your keyboard clean is to prevent any damage, being careful around your keyboard and making sure not to bring food and drinks around it can make a big difference. However, the oils on your hands can do some damage too, and other than continually washing and drying your hands, there is really no way around that.
So, if you need to give your mechanical keyboard a good washing, then here is how to do it.
Prevent Any Build Up First
If your keyboard is not too far gone and only has some light cleaning, then keep up with this to ensure that it doesn’t get worse. This is the absolute best way to keep your keyboard in prime condition for as long as possible. Light cleaning here and there will keep your keyboard working properly.
What To Do:
What you want to start with is simply getting any small pieces of debris out from between the keys. To do this, just simply unplug your keyboard, turn it upside down, and shake it out. This will get any larger pieces of dirt and dust.
Use compressed air to blow out any debris that is left in the crevices. You can also use a vacuum for this portion, as some keyboards ask that you don’t use compressed air.
Then, using a soft microfiber cloth with a bit of alcohol, gently rub the cloth over the keys and surrounding areas to disinfect and get rid of built-up oil residue.
How To Deep Clean Your Keyboard
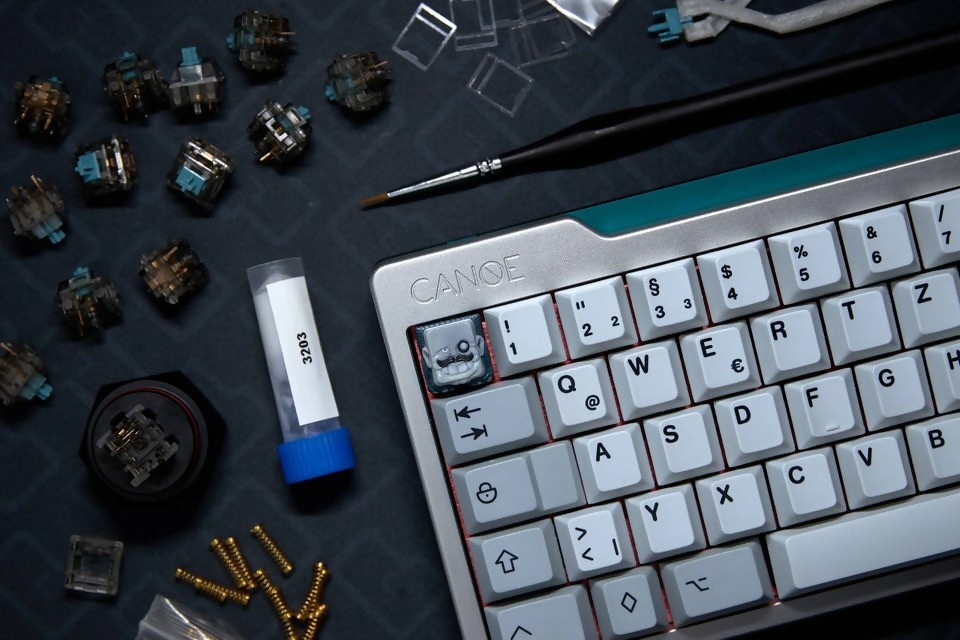
To deep clean your keyboard, you will have to get it a little more attention to get in there and get all the gunk out. You should take a picture or have a list of the order to place all the keys for when you put them back together and then you will begin by removing the keycaps.
You will want to get a bucket and fill it with warm water and soap. You will use this in a minute., then you can begin the process.
Removing The Keycaps
There are key pullers to remove the caps, and this will save a lot of time and effort. They are worth it, and they are relatively cheap. Most are around 3 or 4 bucks, and they will make this process painless.
Then, take the removed keycaps and place them in the warm water and soap. You can leave them in for as long as you need, but it is usually recommended to leave them overnight. Just remember, the better you clean them now, the longer they will stay clean. So, keep that in mind.
Give The Keyboard a Once Over
While the keycaps are soaking is the perfect time to clean the rest of the keyboard, so you can start by using a cloth or cotton swabs with a bit of alcohol to clean in between the key switches. You want to get rid of any dust and dirt that has accumulated and disinfect it
Then, you will probably want to go over it with compressed air, or a vacuum, just like for preventative cleaning. Blow the air in the same direction the whole time to make sure that you aren’t just moving it around, but getting it out.
Once you are done, you won’t be able to put the keycaps on yet because they will still need to soak and dry. So, place your keyboard face down on your table or desk to keep any dirt or dust in the air from collecting while you’re waiting for the keycaps to dry.
Spilled Beverages
With all this being done, we want to talk about spilled drinks, which are a whole other mountain to climb. If you have spilled some water, this may not mean the death of your keyboard, unless it was completely drowned.
However, drinks that contain sugar or alcohol, like soda, beer, wine, and energy drinks may mean that you have to put your keyboard down for good. And, even if you do get it cleaned up right away, that doesn’t necessarily mean that it can be saved.

But, in the event of a spill, you should keep yourself from moving your keyboard. You want to keep the liquid from spreading and getting into key switches, so moving it will just exacerbate the issue.
You should remove the keycaps and see if the liquid is spreading like a wildfire, or if it only in a small area. If it can be salvaged, and the switches are intact, you will want to immediately start the deep cleaning process we went through to keep anything further from damaging the keyboard.
If there is any chance that your keyboard might still work, you will want to do everything you can to help that chance. After cleaning it, you will need to hold your breath, plug it back in, and test it to see how bad the damage was. If you’re lucky, and the spill was very small, then you could go back to gaming. If you’re not so lucky, you may have to fork over some cash for a new keyboard.
Just remember to avoid spills at all costs, place your drinks away from your system, and don’t take a swig over the keyboard. It is worth it to go out of your way to make sure you don’t have to replace a good keyboard.
Follow these cleaning tips and procedures to keep your mechanical keyboard working it’s best, and to ensure that the life of your keyboard will be as long as possible.